With every sale we donate refreshments to Maggies

So you just got your WOT-KNOT kit and found a set of CNC-cut decals. Fantastic, but how do you get them on your model? That's a good question. Here are a few instructions on getting them into place.

The letters on the decal sheet are all self-adhesive and can be peeled and placed one by one, BUT, and there is always a but right? you will find it very hard to get all the letters straight and wrinkle-free, ask me how I know! Thankfully there is an easier way to place the whole decal section in one go and keep all the letters spaced correctly and lined up, and that involves using something called transfer tape.
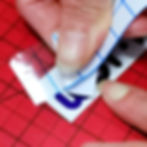
If you have never seen or heard of this, it's the strip of sticky-lined transparent tape in the kit with the WOT-KNOT and has a blue alignment grid printed on it (see above photo). We have given you enough tape to place the decals on the WOT-KNOT but if for some reason you would like more we will make this available to purchase on our shop pages.

OK, so let's get started. First, start by cutting around the lettering you wish to place using the transfer tape. Start with the largest WOT-KNOT text first, as we will be cutting the transfer tape later for the smaller ones. See the photo above, we are using the small text for this example but start with the larger text first.
Cut around your decals, keeping the sides square instead of rounded, as this will make it easier to cut the transfer tape to the same size.
We have cut the transfer tape to the correct size for the larger lettering for you, NOTE do not throw the tape away after you have placed the large text as it can be used multiple times and will be used to place the smaller text later on.

OK so now its time to cut the transfer tape to the size of the decal you want to transfer, remember we have already given you the correct size for the larger text so do this first. Keep the backing on at this point or it will want to stick to everything!
You can allow a small overlap all around but you don't need much, just enough so as not to make it too hard to cover all the text.
Once you have it cut to size start by peeling the backing paper at one end a little to reveal about two centimetres of the clear transfer tape, this also has the blue grid printed on it to help with alignment.
You can now go ahead and start sticking the tape to the decal keeping it straight and making sure you have no large air bubbles. Do a small amount at a time peeling the backing slowly as you go. We find using a gift card or some stiff card useful for rubbing the tape down and pushing any air bubbles out.
Once you have the tape fully on give the tape a good rub down with your card, don't go too mad we just need to make sure the letters stick to the tape well.
Now turn your decal over so the backing paper is facing you and starting from one corner peel the paper off to reveal the letters that should stay stuck to the transfer tape. If they stay stuck to the paper put the paper back down and rub again until it stays on the tape. Do this slowly, take your time. If need be to avoid greasy fingers on the transfer tape use a little of the transfer tape backing paper you peeled off earlier to hold the tape down while you peel. Eventually, you should end up with all the letters stuck to the tape ready for placing on your model
OK so now you have all the letters stuck to the transfer sheet it's time to line them up on the model. Orientate the transfer tape so you can read the writing through the film backing and it is the correct way up, the transfer tape with the gridlines should be facing up.
You can now place the decal on your model, as shown in the video below. Use the gridlines to help align everything, and once in place, give the letters a firm rub down. All that's left to do now is gently peel the clear backing sheet away leaving the letters stuck to your model. If any of the letters want to lift while peeling simply lay it back on and rub down again until stuck.
Thats it!
Don't throw away the clear tape yet! re-apply the backing paper to keep the dust off the sticky side, you can re-use the tape for more transfer jobs like your small Wot-Knot decals.
