

New Style Glider Build Part 1
- Future Crafts

- Aug 12, 2025
- 3 min read
Back To Basics
As some of you are aware, I have been battling leukaemia for the past year and a half, and I'm happy to report that I'm beginning to win! This struggle has left me a bit unsteady when flying some of my more challenging model aircraft, which makes me feel unsafe when flying with my friends, despite their incredible support. This situation got me reminiscing about a part of the hobby I used to engage in frequently years ago: flat field thermal gliding and slope soaring.

I decided to return to the basics and give this another try because it's a slower and more forgiving style of flying, which allowed me to rebuild my flying skills gradually. With this approach, I remembered a build plan for a small hand or bungee launch glider that appeared in the February 2025 issue of RCM&E, called the "New Style" by Ton Van Munsteren (pictured below).

Laser File Conversion
This appeared to be a simple model to construct, and I could easily assemble it using parts from my scrapbox along with some new balsa wood. I decided to transform the plan into laser-cut files using Light Burn, which would make any future repairs or modifications easier (more on that later). In addition to my usual flying club, I also fly in open spaces with plenty of gorse, which can make landings quite harsh on the model and its covering. As a result, having a plane that's easy to repair allows me to fly it often in these areas without much worry. Being of an older design, it has no motor or speed controller to worry about keeping this a very light, floaty thermal glider and a low-cost build.
I began with the vertical and horizontal stabiliser, which are built over the plans. This approach is straightforward, lightweight, and accessible to even beginner builders. Having a set of laser-cut parts makes the process quick, precise, and highly enjoyable. After that, I proceeded to prepare the wing rib files for cutting from light balsa. The plan calls for 3mm ribs, but I decided to make them from 2.5mm to keep weight to a minimum and still allow for easy building. The capping strips on the top and bottom give them more than enough rigidity and give the covering some support.

Transforming all the paper plans into laser files requires time and considerable adjustments. A pencil line can resemble a crayon in terms of the laser's precision. Many of these plans are quite old and were not originally created using CAD, so their accuracy is lacking. However, with careful measurement and a bit of patience, you can produce a quality set of files.

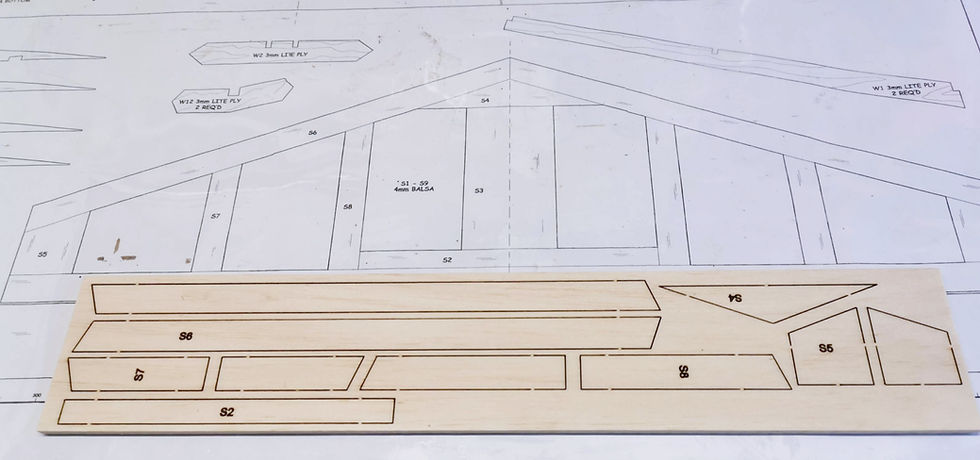
I engraved the part reference numbers on the wood for quick identification, but on future builds, I engrave these on the main wood panel so they don't show through the film covering. OK, so that's a bit of a clue! I am looking to make a laser-cut short kit in the near future, depending on what permissions I can get, so keep an eye out for any updates here on the Future Crafts blog.

Test Fit Time
After cutting some of the other major parts as they were converted, it was time for the first test fit. Some of the tabs and slots needed a bit of adjustment, but for a first build, they are fine. I like to get a tighter tolerance if I am going to offer it for others to build, but because wood is an organic product and no two sheets are ever the same, I still like a bit of clearance to allow for easy alignment when glueing the fuselage together.
Comming Next
I will show some of the build and the start of the covering in the next post, and if you are interested in a short kit, let me know in the comments. So I better get back to building, see you in part 2. Happy Flying

Hi Glen looking forward to the next installment and maybe details of the short kit..